
Customer Central Tabs in CSM Configurable Workspace
 Saura Sambit
In ServiceNow's Customer Service Management (CSM) application, Case Types help in streamlining processes and ensuring that each customer query is addressed appropriately and efficiently. The configuration of case types can be customised to fit the specific needs of an organisation, allowing for different workflows, escalation paths, and resolution strategies based on the nature of the case. In this article, we will learn the process of enabling the 'Customer Information' and 'Customer Activity' tabs for the extended case types in the record view of CSM workspace.
Existing functionality
OOB record page for Case
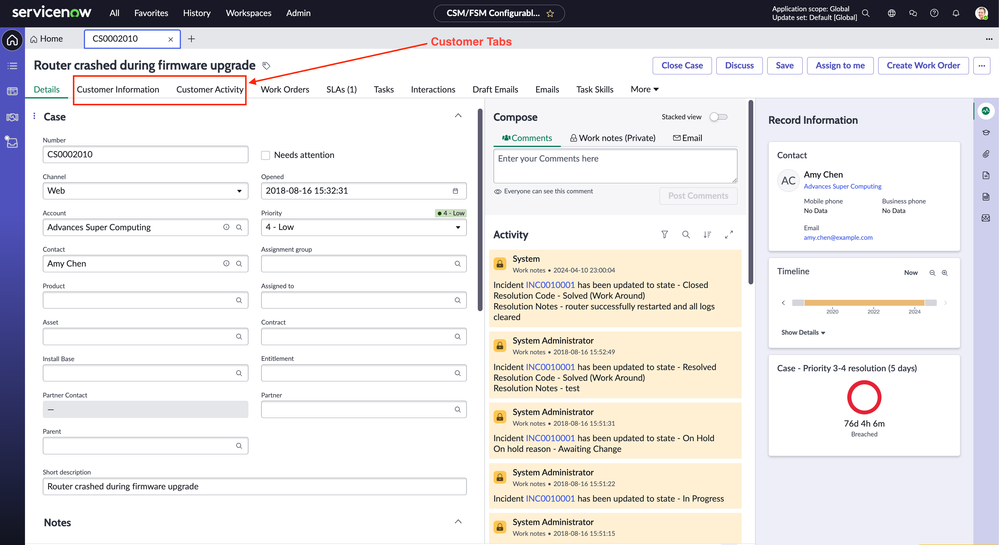
Below is how the screen layout looks for a record from the out-of-box Case [sn_customerservice_case] table. Notice the two 'Customer Central' tabs after the 'Details' tab.

OOB Customer Information tab
Below is how the screen looks on selecting the 'Customer Information' tab. We get a handful of pre-defined widgets displaying the data related to the Contact who has opened the case.

OOB Customer Activity tab
Below is how the screen looks on selecting the 'Customer Activity' tab. We get a holistic timeline view for the activity of the Contact who has opened the case.

Default screen layout for a new Case Type
When we create a new Case Type by extending a table from the Case [sn_customerservice_case] table, a lot of workspace features become unavailable. Among those are the two 'Customer Central' tabs which do not come by default. Below is how the default layout looks for a new case type table, Product Case [sn_customerservice_product_case] for this example.

Configuration steps
Follow the steps listed below to make the 'Customer Central' tabs available for each new case type that we extend.
Pre-requisites
- Plugins -
- CSM Configurable Workspace
- Customer Central
- CSM Configurable Workspace
- Role - admin
Modify the tab visibility conditions

4. Under the 'Pages and variants' list, look for and open the 'Customer Information default' record. Notice that the page is read-only.

5. From the hamburger menu at the top left, under 'Developer' click on 'Open variant record', it will take us to the UX Screen record in the backend.


6. In the Macroponent Configuration field, look for the object that sets the value for 'contextResolutionFieldMap'.

7. We need to change this part to accommodate our new case type table. Our case type table for this example is 'sn_customerservice_product_case'. Modify the component as below, save the record and remain on the form.

8. Next, scroll to the bottom and open the record present under the 'UX Screen Conditions' related list.


9. In the script part of the screen condition record, look for the code snippet that checks for the table and sets the 'contextResolutionFieldMap' object. It would be something like the below.

10. We need to change this part of the code to accommodate our new case type table - the condition check and the resolution map for our new table. Modify the script like below and save the record.

11. Clean the cache with 'cache.do'.
Verify your configuration
If all the 11 steps have been followed accurately, the 'Customer Information' tab will successfully render on the case type records and the data will also be pulled from the extended table alone.

If the tab is still not visible, backtrack on the mentioned steps and verify whether all of them were executed correctly.
Next steps
- We still need to enable the 'Customer Activity' tab - it requires the exact configuration steps, except for Step 3, open the 'Customer Activity default' record in UI builder.
- Need to add/modify/remove reports? Create duplicate variants of the pages and set a lower value to its order.
https://www.servicenow.com/community/next-experience-articles/customer-central-tabs-in-csm-configurable-workspace/ta-p/2973576