
Using Figma for Employee Center Designs
 New article articles in ServiceNow Community
·
Oct 25, 2024
·
article
New article articles in ServiceNow Community
·
Oct 25, 2024
·
article
This documentation will walk through locating the Employee Center Figma files on the ServiceNow community site, download and set up of the files and how to modify the file components.
Checklist before you Get Started
- Install Figma for Desktop (recommended)
- Create a Figma Account if you do not have one already
Step 1: Set up your team and project folders
- Open Figma
- Create a home for the Figma files
- (If you are on Figma Organizations plan) Create a Team called “Shared Components” and a Project called “Employee Center”
- (If you already have a Team space set up) Create a Project in your team workspace called “ServiceNow Employee Center.
- (If you are on Figma Organizations plan) Create a Team called “Shared Components” and a Project called “Employee Center”

Step 2: Download Figma Files and Setup your Project Space
Now that you have set your project space up, it’s time to import your files into your project.
- Navigate to the ServiceNow Figma community by clicking this link: https://www.figma.com/@servicenow
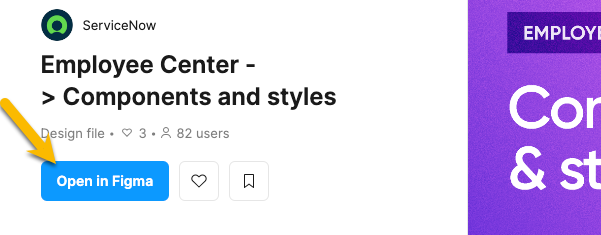
- Locate the file “Employee Center Components & Styles”
- Click “Open in Figma” or import the file into your Figma. Note: if you don’t see this option, please refer to the Figma documentation for importing files.
- Once opened, your file should be stored in “Drafts”
- Right click on the file and move it to your project space
- Click “Open in Figma” or import the file into your Figma. Note: if you don’t see this option, please refer to the Figma documentation for importing files.
- Back in the ServiceNow Figma Community, locate the file “Employee Center Templates”
- Repeat steps 2a-2c
- Once in your project folder, import your files [Employee Center Templates] and [Employee Center Component & Styles]


Checkpoint: At this point, you should have both files called “Employee Center Templates” and “Employee Center Components and Styles” loaded into your project folder. If not, go back through the steps.

Step 3: Publish Libraries
For each file, publish it as a library so that you can access it in other files.
- In your EC Components file, you'll need to publish as a library
- Click on the dropdown arrow next to the file name and select “publish library”.
- Repeat steps 3.1 and 3.2 in your EC Templates file.

Step 4: Working With Components
- Create a new Figma design file or open an existing one
- In your design file, open the Assets panel in the left sidebar.
- Click
Libraries to open the Libraries modal.
- To enable a library, locate the library you want to add from the list of available libraries and click Add to file.
- Add the library "Employee Center Components & Styles"
- If you don’t see the library you’re looking for, try toggling the dropdown (see screenshot below).
- To disable a library, hover over the Added button and click Remove.
- Exit to close the libraries modal.
- If you need additional support or if you are running into issues, follow the steps in Manage libraries in design files

Step 5: Start Designing!
- You can now bring the assets into your design space by clicking into the asset and dragging it to the page.

2. Follow Figma's documentation to learn more about how to modify and work with components.
Additional Resources
- Review Figma's documentation site to learn more about working in Figma.
- Get all the necessary steps, tools, and resources to start crafting experiences with the Horizon Design System.
https://www.servicenow.com/community/user-experience-sig/using-figma-for-employee-center-designs/ta-p/3084031