
Developing a Custom UI Component with the Now Command Line Interface (Part 2 of 2)
The ServiceNow Command Line Interface (ServiceNow CLI or “SNC CLI”) is a tool which you can install and use it to make your own custom components which you can then leverage on a UIB page much like other components which ServiceNow has developed for your use.
If you have not installed the CLI yet, go to Part One of this two-part guide (where steps A through C are covered).
D -- Setup your project
Create Application Scope in your Instance
1. Setup a new application scope in your instance to install your component into.
2. Open System Applications > Studio within your instance.
3. Click Create Application button to create a scope to use just for the component. Any other assets, like the UX page that uses it or other supporting configs like tables and flows should be in other app scopes.
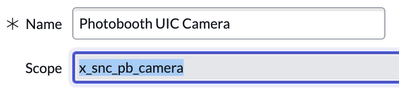
4. Give it a name that represents precisely what the component does and make a note of the scope.
5. Click "Create" then "Continue in Studio" to complete scope creation.
6. Open the newly created app and then select File > Settings and verify that "JavaScript Mode" is set to ECMAScript 2021 or greater.
Here is an example of my scope's name which I then used with the following command to setup my project.

E -- Scaffold your Component
The SNC CLI tool will scaffold a bare component to begin development from, including references to dependencies so that Node Package Manager (NPM) can download dependencies.
1. Create a new folder in your dev folder that matches the name of your project but lower case and with dashes (unlike other tools, such as git, SNC CLI will not create a subfolder automatically).
E.g. ~\dev\photobooth-uic-camera or c:\dev\photobooth-uic-camera.
2. Change into your new project folder and execute the following command.
NOTE: The name uses dashes and the scope uses underscores. The org name can be anything. I use my initials.
snc ui-component project --name @myorg/hello-world --scope x_snc_hello_world
F -- Install Dependencies
Finally use NPM to install the necessary dependencies. Heads up--this will take quite a long time.
npm install
H -- Continue to Develop a Component
Complete "Develop a component" from the official docs but do NOT use the suggested commands to run the app locally as specified in Step 4.
Instead simply use this:
snc ui-component develop --open
This will run the component locally and open a web browser for viewing.
I -- Deploy your Component to Your Instance
Before deploying your component to your instance be sure to follow the instructions to configure the now-ui.json file which is created for you. This maps properties and attributes and is a manifest that lets UI Builder (UIB) know that it's available to drag and drop into your page and allows a UIB developer to specify properties and respond to events.
Note: In earlier versions I stated that you must always use "--force", but as of the latest version of the CLI that is no longer necessary. Do NOT use force as it wipes out the entire app scope when you do this!
snc ui-component deploy
J -- Pro Tip for Git
You may add your component scope to source control from Studio in your instance and then use the same repo to host the source code while you are working on the component. In this way you can push the deployed version of the app to the repo from your instance after each deployment but also keep the raw source code behind the scenes in the same repo. If you wish to take the component to another instance you may simply pull it from Git directly into the instance without having to use the CLI.
K -- Post Deployment Steps
There are two things to do once you're ready to start deploying the component to your instance.
Create a UIB Test Page in a Different Scope
Go back to your environment and create a new scoped app to test your component. I like to use the naming convention like "photobooth-app" and "photobooth-uic-camera". Then add a new UI Builder page to the app and drag and drop your new component!
The test page and the component must be in separate scopes because while deploying components the tools erase everything and start over and your test pages will be destroyed.
Create and Bind Events Manually In the Instance
After deploying your component if it dispatches events you must go into your environment and manually specify which events it dispatches and responds to.
1. In your environment change to your component's scope.
2. Create sys_ux_event records by opening Now Experience Framework > Actions and Events > UX Events and clicking New.These records are extremely simple and should match the long event name of the event from your component (e.g. "POPULAR_ARTICLES_CARD_CLICK") and hav a pleasing label that will be visible within UIB (e.g. "Popular articles card click").
2. Locate the sys_us_macroponent record for your component and select your events in Dispatched Events field then save the record.

Note: At one point there was a bug in the now cli which caused your event bindings to get wiped out after each deployment and I had suggested a work around here. As of version 1.1.2 (v26+ of the @Servicenow-cli) that is no longer necessary!
https://www.servicenow.com/community/next-experience-articles/developing-a-custom-ui-component-with-the-now-command-line/ta-p/2502529